Are you one of those who jumped on the Google AMP ride only to get hurt later? Do you want to opt out of Google AMP?
Well, I was one of those who were sold out on the AMP benefits and didn’t think twice before getting sites AMP’ed.
But soon, the novelty wore off and I could see a bunch of folks from the SEO fraternity ranting against the ills of Google AMP.
Why I Want to deAMPify my Websites
Here are some of the compelling reasons why content publishers like me would like to disable Google AMP
Bad UX: Google AMP strips your site off many features that you added to create a unique experience for your visitors. Worse, it offers only a standard template for AMP which means, on default mode, all AMP’ed pages look exactly the same.
Bounce Rate: By the very design itself, Google AMP, by offering a “Close Button” on the header of the AMP’ed page, encourages visitors to click back to the SERPs (Search Engine Results Pages). This is the biggest problem as most visitors will be tempted to go back to their search results rather than exploring more content on your website. Moreover, Google AMP strips your page of the “Related Posts” plugin. As a result, your visitors won’t be able to read more of the similar content you’ve painstakingly created for your visitors.
Limited Ad Integration: Many content publishers make a living out of ads on their blogs. However, Google AMP makes it difficult for content publishers to display ads on their AMP’ed pages, which affects the ad revenue.
All of these reasons (and more) have discouraged many bloggers to disable Google AMP on their site and switched back to normal mode.
Steps to Disable Google AMP in WordPress
There are several ways to disable Google AMP in WordPress. However, for the sake of brevity, I’ll keep it simple.
Basically, there are two steps to disable Google AMP in WordPress.
Step #1: Add the Following Code to the top of Your .htaccess file
Step #2: Disable Google AMP supported Plugins
Step #1: The code below essentially redirects all your AMP’ed URLs to their respective Non-AMP’ed or standard URLs. Add the code to the top of your .htaccess file and save your file.
Go to your desktop browser and check if the AMP’ed URLs are redirecting to their standard version.
For example, check if http://example.com/my-blog-post/amp/ is redirecting to http://example.com/my-blog-post/ automatically.
Once this is confirmed, move on to the next step.
Step #2: To disable Google AMP, you need to deactivate all AMP-related plugins you’ve installed on your site.
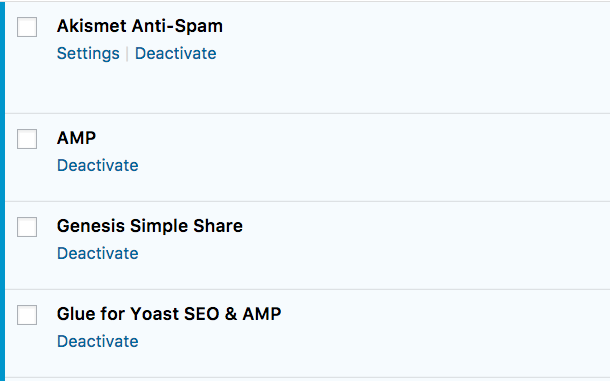
In my earlier Google AMP installation guide, I recommend installing both AMP by Automatic and Glue for Yoast SEO & AMP. Deactivate both of them, but don’t delete them just yet.
Your job is done, but you still need to allow Google bots a week or so to reindex your standard pages and remove the AMP’ed versions from Google’s search index. This can take a little longer if you have a huge number of posts.
To expedite the process, you can submit your sitemap to Google Console.
Not Familiar with FTP?
If you’re not familiar with FTP or .htaccess, you could go with the plugin way.
Step #1: Install and Configure the Redirection Plugin.
Step #2: Deactivate the AMP Plugin(s)
In Step #1, you need to install the “Redirection Plugin”, activate, and then configure it in the following way.
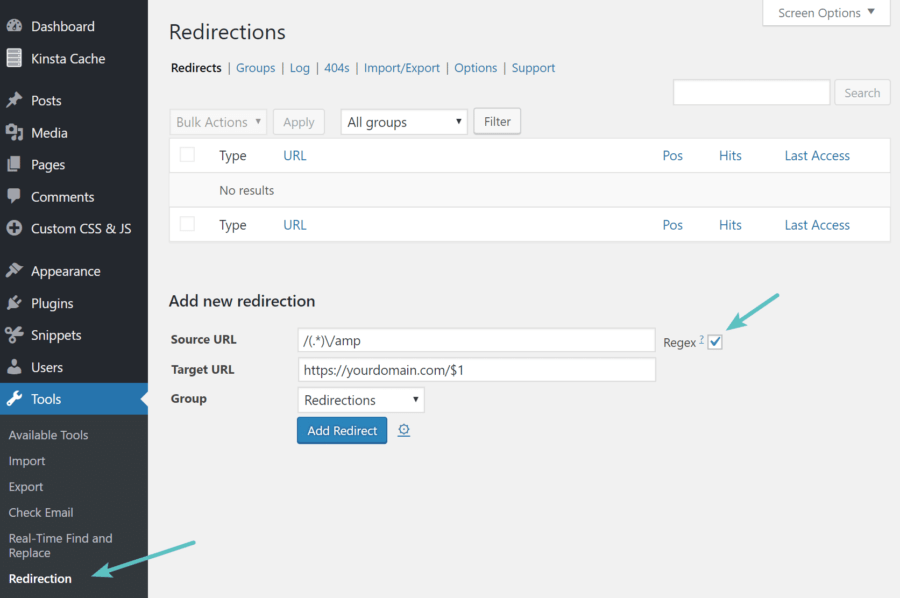
- Enter /(.*)\/amp in the Source URL
- Check the Regex Box
- Enter https://yourdomain.com/$1 in the Target URL (Make sure you change your domain name)
- Choose “Redirections” under Group and Click on “Add Redirect”
- Go to your browser and verify the redirections
In Step #2, you need to deactivate the two AMP plugins I’ve mentioned earlier.
That’s it. You should now wait for Google to no-index your AMP’ed URLs and reindex your standard URLs. Just give it a week or two.
Did you find this guide useful? Then please, share it with your friends on social media and spread the goodness.
Also, leave a comment below if you have any trouble getting along with the steps I’ve explained in this guide.